This cute long sleeve tee started out as a larger version of what you see and was one of my daughter's favorite tee shirts. It is fun to check the marks on the wall to see how much they grow, but my daughter also feels a little sad to outgrow her favorite clothes. So one way for her to still enjoy her top, is to have a version of it made for her doll. (Who will, by the way, never have to worry about out growing anything!)
This is the tee shirt that I started with.
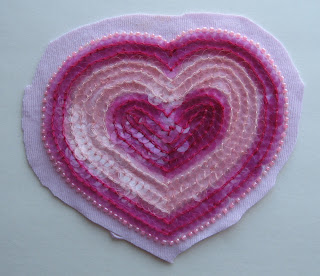
This is a closeup of the sequined heart.
I cut out two sleeves using original sleeves and their existing hems
.
.
I also cut out the front piece from the original front , and the back pieces from the original back. Again I used the existing hems.
Next I cut out the sequined heart. this is what the original heart looked like
.
.
I then carefully cut out a smaller heart, cutting between the rows of sequins.
I also cut off the neck trim close to the neck seam. I placed the heart and the trim onto the front piece to see where I wanted to place the Heart applique'.
Here you can see the smaller heart shape with the original piece it was cut from. I think that I might use what is left of the original heart shape and put it on a plain pink long sleeve tee that my daughter already has. Then she will have(almost) matching tee shirts!
I attached the heart with an iron-on fusible hem tape cut to size. Next I sewed the shoulder seams with a 3/8" seam allowance. I finished the seams with a stretch zig zag stitch.
Then I pinned a piece of the neck trim to the neck and cut to size. I sewed along the center existing stitch line. I then pressed the excess fabric back and sewed the trim again along the second stitch line, which tacked down the turned back fabric.
This view shows the finished neck trim. I then sewed the sleeves to the body along the shoulder seam only, as shown above.This photo shows what the top looks like so far from the inside.
 Next, I turned back 3/8" along the center back opening and sewed 1/4" from edge. I could have made the top so that it only opened at the neck, and feel free to do it that way, but I have found that it is easier to make and easier to put on the doll when it is made to open all the way down the garment!
 I used iron-on hook-and-loop for the closure. I cut the pieces to 1/4" wide and attached the loop part to the right side of the right edge and the hook part to the inside of the left edge. Finished!
This is the back view of the finished piece.
Thanks for stopping by! Please let me know what you think.
Creatively Yours,
Donna


Cute top!!!!
ReplyDeleteThanks! I had fun making it!
DeletePretty!
ReplyDeleteyou are an inspiration ♥ ♥ ♥
ReplyDeleteI love all of these!!! I really think you should keep posting! awesome ideas!!!
ReplyDelete